
Photography Series Pt. 0

This is the start of a series where I learn the ins and outs of film photography. By no means do I consider myself a photographer, nor do I claim to be any good at anything I show here. That being said it seems like it’s going to be an interesting journey, so I’d like to take you along for the ride.
First off, how and why did I start doing film photography this late into the age of the digital camera? In 2018 while I was attending school in Oneonta, I came across a yard sale and decided to poke around. An old camera bag caught my eye, and as I was looking through it the woman running the sale said I could have it for free if I wanted it. It had two 35mm film cameras, a few lenses, some other accessories I didn’t understand, and over a dozen new rolls of film. Being a college student at the time, it was hard to turn down a package like that for the low price of Free.99, so I took it. After I got home I unpacked everything to see what I really had. The first camera, a Minolta, did not turn on and I couldn’t really figure out how to work it. I gave it away to a friend who was looking for a camera, thinking maybe he could get it working someday. The second camera (the one I currently use) was a Fujica AX-3 SLR. The camera was most likely made in the mid-80s in Japan by the Fuji company, whom you may recognize today as FujiFilm. It’s a mid-range 35mm SLR camera with a built-in light meter. The 35mm refers to the film stock used: regular old film canisters that everyone remembers from past decades, which are still available for good prices from places like B&H Photo or local photography stores. SLR stands for “single-lens reflex.” Behind the lens is a mirror that angles up into the viewfinder, so when you look through the viewfinder you see the exact view through your lens. When a picture is taken, the mirror swings up and out of the way while the shutter is opened, letting light pass through to the film. Finally, the light meter gives you a reading on how much light is available in the scene you wish to shoot, and helps you get the correct exposure.

Once I had gotten a new battery for my camera to run the shutter and light meter, I was off to the races. It took about 4 months to finish my first roll of film, but I didn’t know where to go to get it developed. So the finished roll sat on the shelf with the camera for just over 2 years. Around the time I started this website, I was digging around some boxes and found the camera and film again. I needed a hobby, so I decided that I was going to learn how to use this thing. Between a trip to the Adirondacks and another trip downstate near Bear Mountain State Park, I filled up most of this roll in about a month, but it took a while longer for me to finish it. When it was done, I finally found a place to get the film developed: Johnson Camera in Syracuse NY on Erie Boulevard. They are fantastic, and as long as I live in the area I’ll be bringing my film there to have it developed and scanned. I eagerly awaited the results of my first 3 years/2 rolls of film photography and then: disaster.
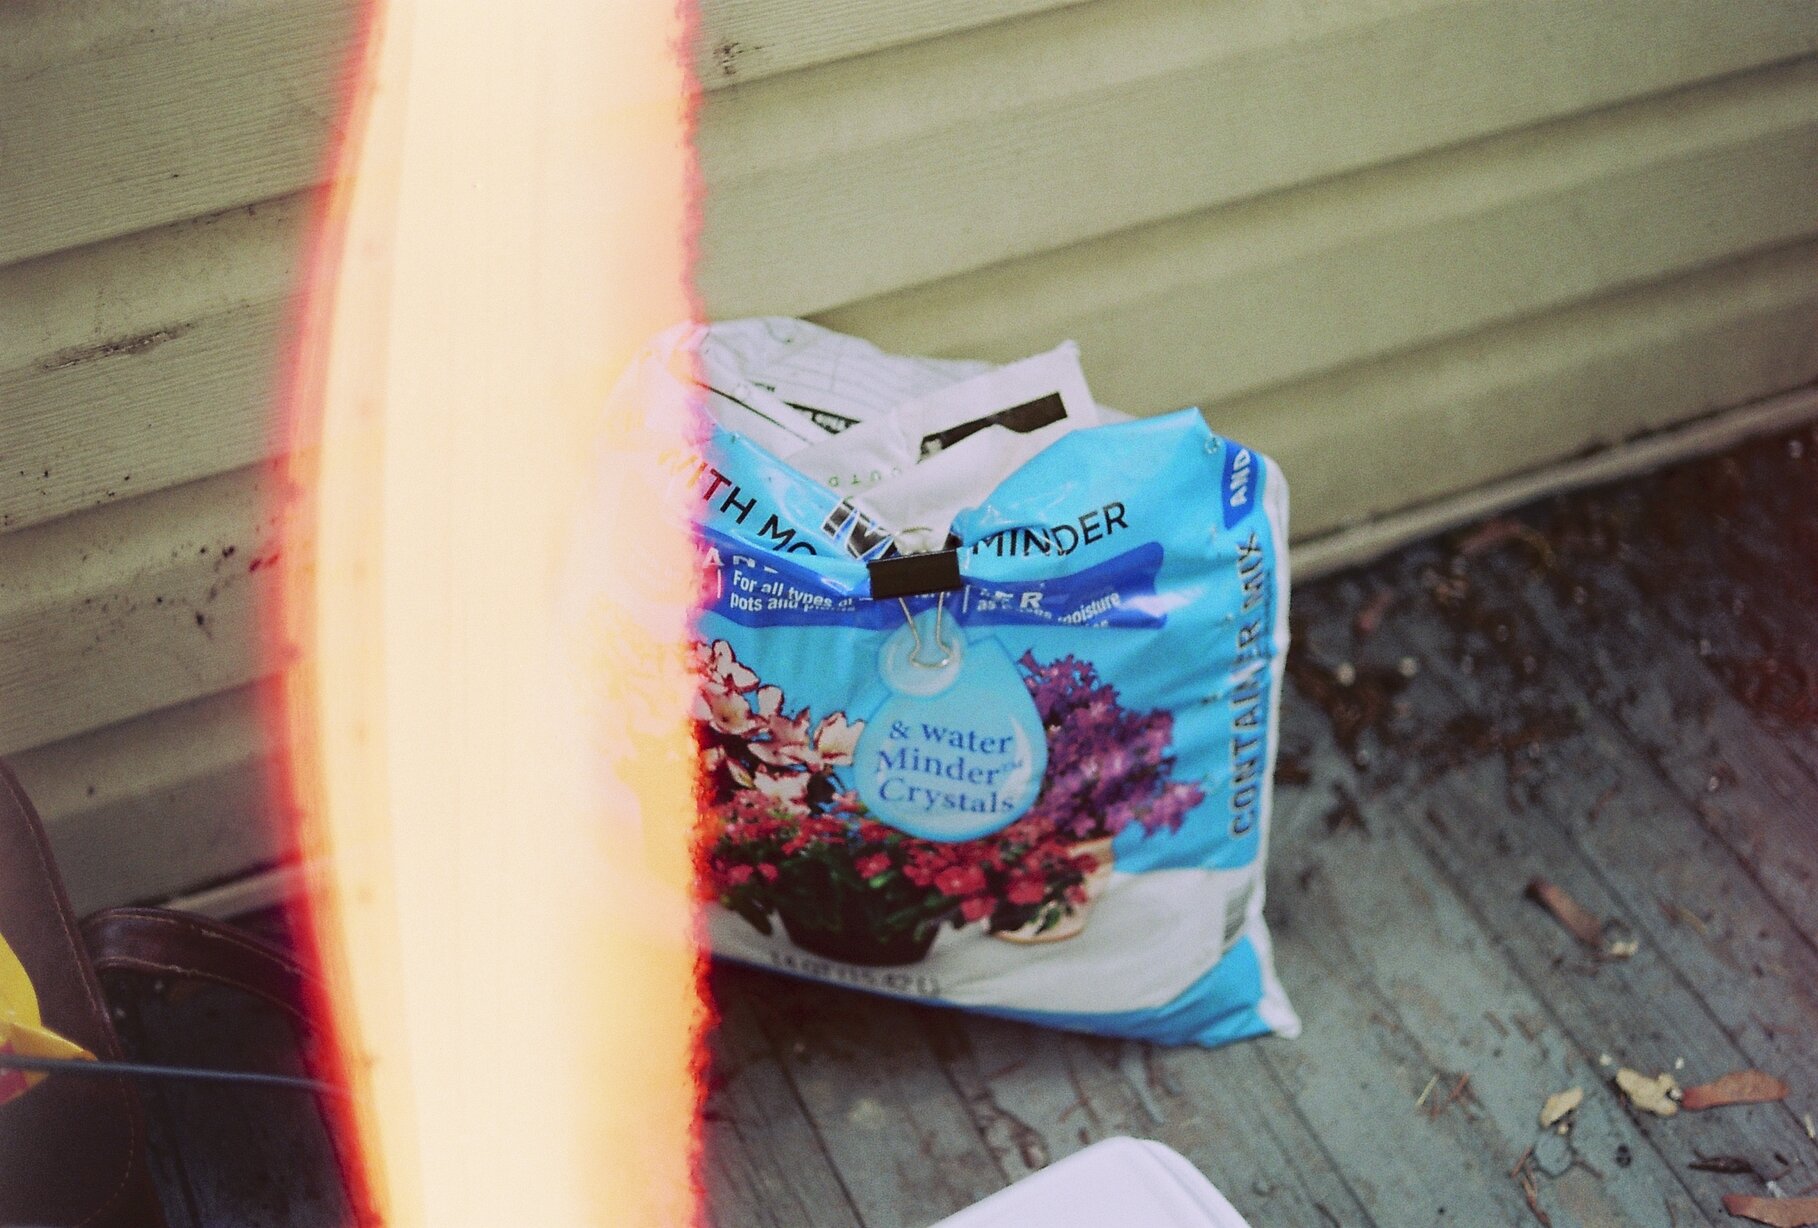
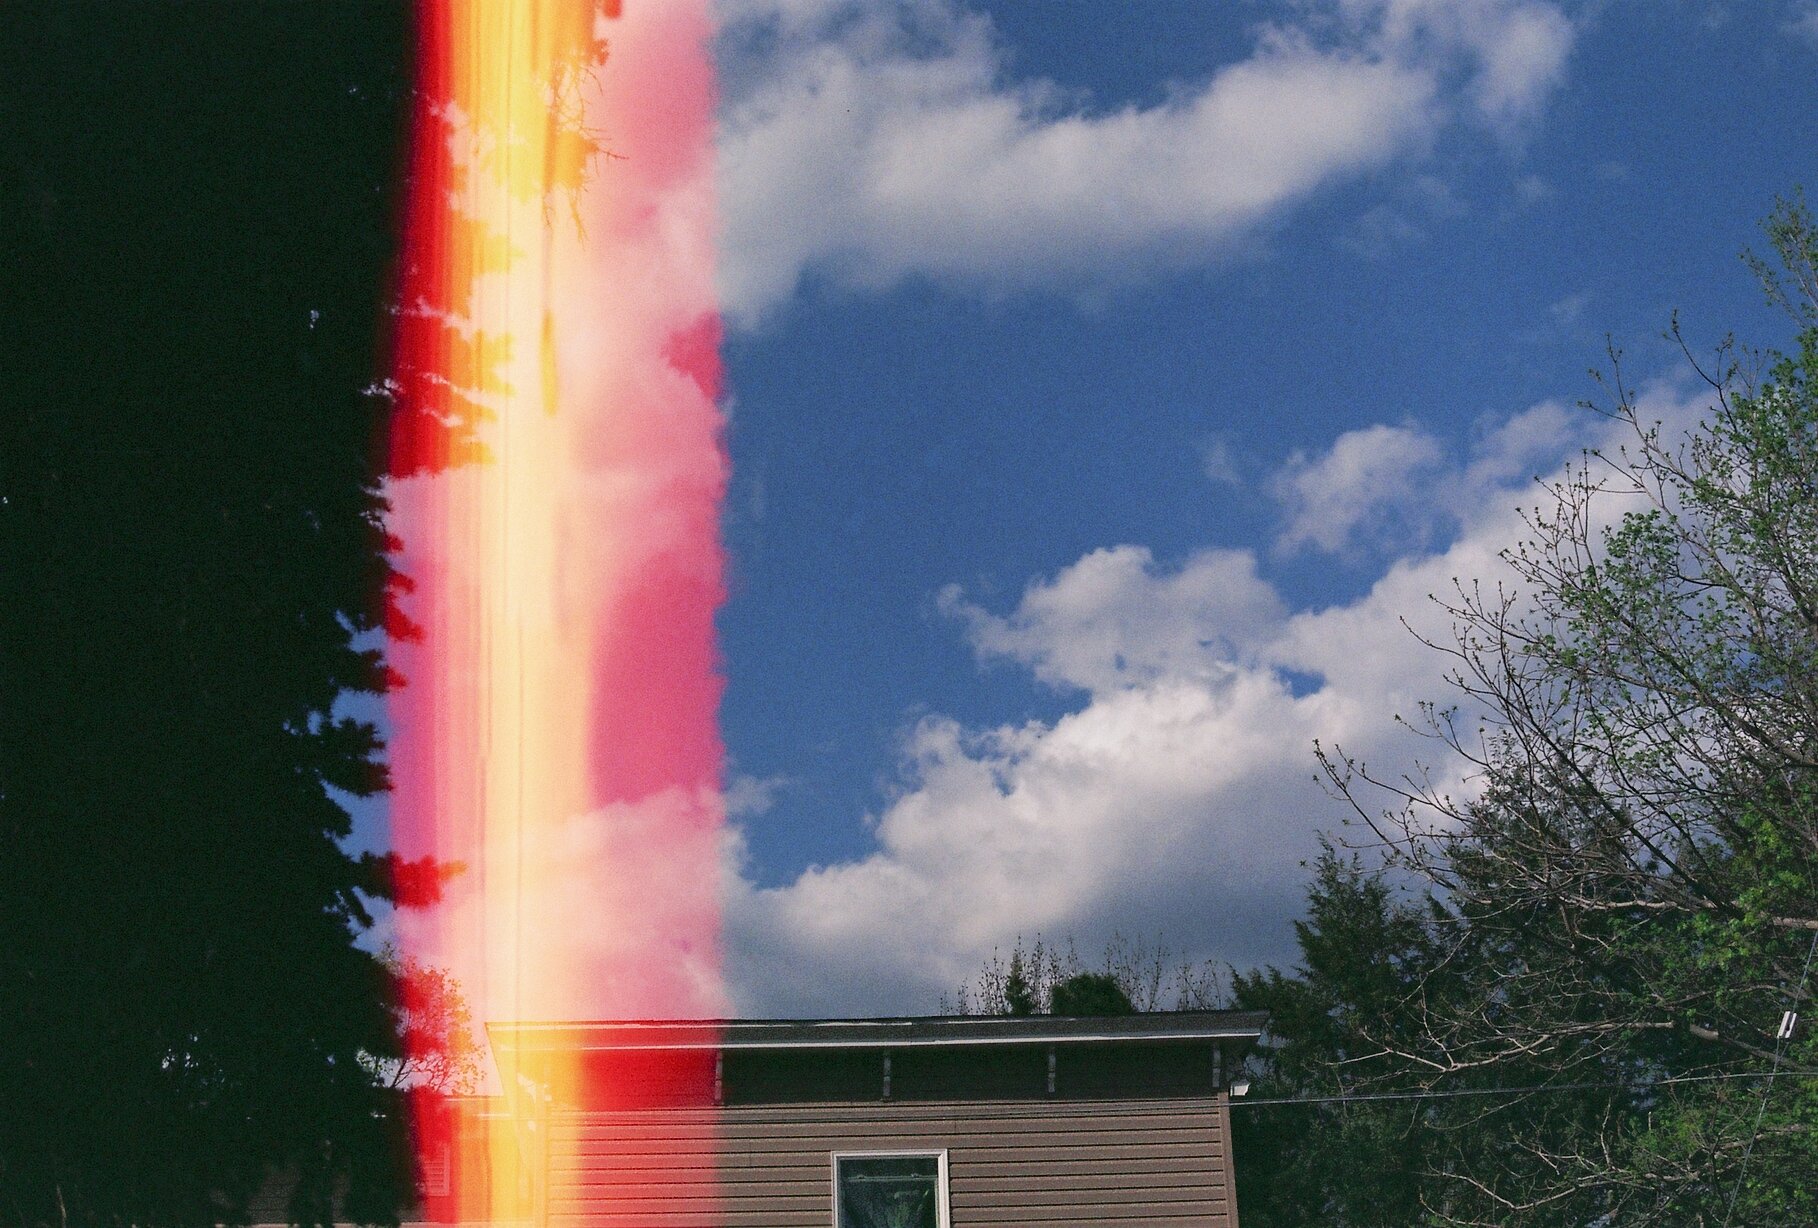
I had a horrible light leak in the camera, which caused a large streak to appear in most of the photos. I’m actually quite proud of some of this first roll, the exposure is quite good on some of them. The second roll fell victim to another disaster in tandem with this problem: I had fogged it.

When I had finished the second roll, it got stuck while I was trying to wind it up. Not knowing how to fix this, I figured I would have to open the camera and get at the film with my hands. I went into a closet, and turned on a red flashlight so I could see. I thought since you always see red light in dark rooms in movies that red light won’t hurt undeveloped film. This was definitely not the right move. The red light was too strong, and light soaked or “fogged” all of my pictures deep red. Next time, I’ll do it without any lights.

After this, I knew that I needed two things: First, a new light seal kit to fix the light leak. Second, to not shine my dumb flashlight at my film. The light seal was actually an easy fix, and kits for various cameras can be had on eBay and other places for reasonable prices. I got an AX-3 light kit for $12 that came with all new foam and some alcohol gel, which delays the adhesive action long enough to get the seals into their proper places before they stick. Once I knew what I was looking at, I realized there functionally was no light seal at all in my camera; the foam had disintegrated years ago. With my new light seal in place, I started reading and watching videos on exposure and composition so that I could actually take good pictures and have my new hobby be worth the cost. At the time of writing, I have just delivered my third roll of film to be developed, and once I get it back we’ll see if I have improved and if the light leak has been fixed.
